Well, I am here! It's been since DECEMBER since I've posted anything on here. To say that this semester has been busy is an understatement. I honestly don't think I've been this busy with school related events in all my years of teaching. I can't complain too much, though, because I have a job. :)
Anyway, today I'm posting a project that has been finished since January. This is another wonderful example of how awesome Cory is. Our house has 3 bedrooms but until January, only had 1 bed. That wasn't a big problem since Cory & I share a bed but we both decided it would be nice to have an extra bed in the house in case one of us was sick or wanted to stay up and read/watch television without disturbing one another.
I didn't want the bed to take up too much room so I thought we could get a day bed and use it as a couch like seat for the most part. I had two daybeds that I admired and showed Cory what I had in mind. Instead of spending a lot of money on a bed we would seldom use he said he could try and make one.
Here's the inspiration picture that I showed Cory. This bed is from West Elm and was about $500 (it's not there anymore).
I also found a pattern for making this bed that Cory based his design on. He actually tweaked it a bit. Here's the pattern.
And here's my lovely bed that my cool husband made:
He made it out of out 2x4s so it's not really high quality looking wood, but we painted it and you can't really tell. It ended up costing $45 for the bed! (minus the mattress)
As I was taking a picture of the bed, I realized I've never posted a picture of this room.
Here's where it is located in our house:
If you'll notice the "office" is connected to the master bedroom. When we first bought our house we had quite a few family and friends come and see our new place. When we would show this room to our guests and I would say it would be "our office" numerous people would recommend that it would be better as a nursery. Now, I'm not mad that people would say that but at the time I was frustrated at the thought.(don't worry if someone reading this said that, I honestly don't remember who said it) This may sound silly but I had wanted a house for a LONG time and was so happy to be at the homeowner status and felt like people were thinking I should graze over the fun home owning stage and skip to the having babies stage. I know I was reading too much into that remark but it made me determined to make this room functional for our lives now, not for something that will (hopefully) come down the line. Not quite there, yet. :) Maybe one day it will change into a different room but for now, this works for us.
Here's our all peach room when we first bought our house:
We started to work by patching up cracks in the ceiling and walls.
My sweet mom helped with this room.

We then painted the ceiling. You may have noticed that our crown molding sat about an inch below the ceiling.
A friend of my dad, his son, and Cory added some extra trim to fill in the gap and it made such a huge difference!
I forgot to take a picture of the old light fixture but here's the base of it. It had a small glass dome around it and was flush with the ceiling.I know fans aren't a beautiful focal point, but in the South, they're a necessity. We added a medallion under it to dress it up a bit.
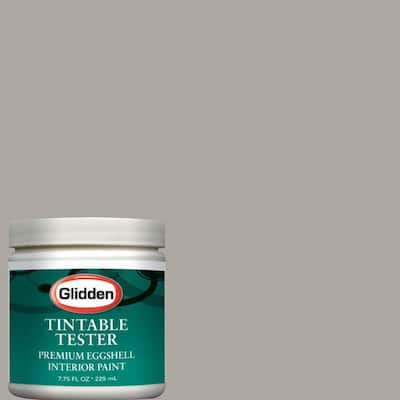
We painted the walls Glidden's Woodsmoke. It's a grayish tan.

With furniture.
I made some pillow covers with some of my favorite fabric.
This is the door that goes into our bedroom. The doors on either side of it are two closets. This room used to be the master bedroom before the old owners added on in the 60's.
Like I said, the old owners added on in the 60's and when they did they also closed in a screened-in porch, making it our sunroom. The shelf along this wall was actually a window until the add on. You can see it on the original floor plan that we had framed. I'm glad they made it into a shelf instead of replacing the wall.
Here's a new-to-us table that my grandfather found for me.
It's weathered and worn a bit and I like it! I can't believe I inherited a piece of furniture and didn't paint it.
And here's a close-up of some newly made art.
I saw directions for this on the blog A Beautiful Mess a while back and decided to give it a try. Mine isn't perfect, but it works. It's made by using paint samples from Lowes. I used my yellow pillow fabric as inspiration of what paint colors to use. Then I used double-sided tape to apply them to a poster, making sure to cover the paint color name. Then I chose some words to put on the poster. It was a toss up between two lines from Beatles' songs: "Ob-la-di, ob-la-da, life goes on" OR "Here, There, and Everwhere". The one I chose was played at our wedding (an instrumental version) so it had a little more meaning. I just printed some letters out from a Word document I typed and then traced the letters on a poster board so the letters would be thick and opaque.
Fun fact: as I'm writing this blog I'm semi-watching the Friends episode where Phoebe gets married and as she's walking down the aisle "Here, There, and Everywhere" is being played on a steel drum. I didn't know she had it at her wedding too.
Well, that's our office. It still needs some more things added (like window treatments and artwork) but as I have learned, decorating is an ongoing process.
I hope everyone is happy and well. Maybe I will post more regularly.


That looks awesome! And, for what it's worth, good call on the taking things in stages. We bought our house and found out I was pregnant in April of last year. I wasn't able to paint, lift, or help much at all! Plus, for us anyway, the baby and the house have both had a huge learning curve (not to mention expense).
ReplyDelete