Showing posts with label Crafts. Show all posts

Sunday, March 18, 2012

New Bed & Office

Well, I am here!  It's been since DECEMBER since I've posted anything on here.  To say that this semester has been busy is an understatement.  I honestly don't think I've been this busy with school related events in all my years of teaching. I can't complain too much, though, because I have a job. :)

Anyway, today I'm posting a project that has been finished since January.  This is another wonderful example of how awesome Cory is. Our house has 3 bedrooms but until January, only had 1 bed.  That wasn't a big problem since Cory & I share a bed but we both decided it would be nice to have an extra bed in the house in case one of us was sick or wanted to stay up and read/watch television without disturbing one another.
I didn't want the bed to take up too much room so I thought we could get a day bed and use it as a couch like   seat for the most part.  I had two daybeds that I admired and showed Cory what I had in mind.  Instead of spending a lot of money on a bed we would seldom use he said he could try and make one.

Here's the inspiration picture that I showed Cory.  This bed is from West Elm and was about $500 (it's not there anymore).

I also found a pattern for making this bed that Cory based his design on.  He actually tweaked it a bit. Here's the pattern.

And here's my lovely bed that my cool husband made:
He made it out of out 2x4s so it's not really high quality looking wood, but we painted it and you can't really tell.  It ended up costing $45 for the bed! (minus the mattress)
As I was taking a picture of the bed, I realized I've never posted a picture of this room.  
Here's where it is located in our house:

If you'll notice the "office" is connected to the master bedroom.  When we first bought our house we had quite a few family and friends come and see our new place.  When we would show this room to our guests and I would say it would be "our office" numerous people would recommend that it would be better as a nursery.  Now, I'm not mad that people would say that but at the time I was frustrated at the thought.(don't worry if someone reading this said that, I honestly don't remember who said it)  This may sound silly but I had wanted a house for a LONG time and was so happy to be at the homeowner status and felt like people were thinking I should graze over the fun home owning stage and skip to the having babies stage.  I know I was reading too much into that remark but it made me determined to make this room functional for our lives now, not for something that will (hopefully) come down the line. Not quite there, yet. :)  Maybe one day it will change into a different room but for now, this works for us.

Here's our all peach room when we first bought our house:
We started to work by patching up cracks in the ceiling and walls.
My sweet mom helped with this room.

We then painted the ceiling.  You may have noticed that our crown molding sat about an inch below the ceiling.
A friend of my dad, his son, and Cory added some extra trim to fill in the gap and it made such a huge difference!
 I forgot to take a picture of the old light fixture but here's the base of it.  It had a small glass dome around it and was flush with the ceiling.
 I know fans aren't a beautiful focal point, but in the South, they're a necessity.  We added a medallion under it to dress it up a bit.
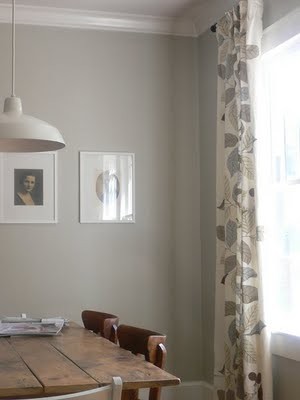
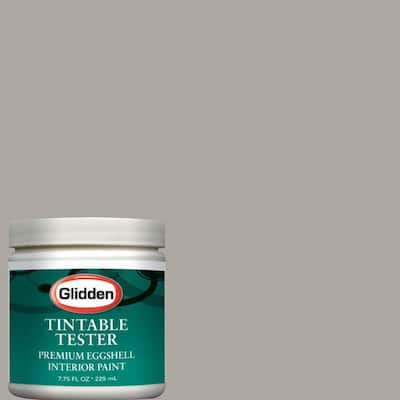
We painted the walls Glidden's Woodsmoke.  It's a grayish tan.


With furniture.

 I made some pillow covers with some of my favorite fabric.
 This is the door that goes into our bedroom.  The doors on either side of it are two closets.  This room used to be the master bedroom before the old owners added on in the 60's.

 Like I said, the old owners added on in the 60's and when they did they also closed in a screened-in porch, making it our sunroom.  The shelf along this wall was actually a window until the add on.  You can see it on the original floor plan that we had framed. I'm glad they made it into a shelf instead of replacing the wall.


 Here's a new-to-us table that my grandfather found for me.

 It's weathered and worn a bit and I like it! I can't believe I inherited a piece of furniture and didn't paint it.
 And here's a close-up of some newly made art.
 I saw directions for this on the blog A Beautiful Mess a while back and decided to give it a try.  Mine isn't perfect, but it works. It's made  by using paint samples from Lowes.  I used my yellow pillow fabric as inspiration of what paint colors to use.  Then I used double-sided tape to apply them to a poster, making sure to cover the paint color name.  Then I chose some words to put on the poster.  It was a toss up between two lines from Beatles' songs: "Ob-la-di, ob-la-da, life goes on" OR "Here, There, and Everwhere".  The one I chose was played at our wedding (an instrumental version) so it had a little more meaning.  I just printed some letters out from a Word document I typed and then traced the letters on a poster board so the letters would be thick and opaque.
Fun fact: as I'm writing this blog I'm semi-watching the Friends episode where Phoebe gets married and as she's walking down the aisle "Here, There, and Everywhere" is being played on a steel drum.  I didn't know she had it at her wedding too.

Well, that's our office.  It still needs some more things added (like window treatments and artwork) but as I have learned, decorating is an ongoing process.

I hope everyone is happy and well.  Maybe I will post more regularly.



Monday, August 8, 2011

Lamp Revisited

Today I decided to change up the lamp that I painted a while back (here). Here's a picture of what it looked like before I did anything to it.
If you look closely (or maybe not that close) you can see that the lampshade is a little stained. This happened during "the flood". This shade was resting upside down on top of a box and the water started to work it's way up.
I thought we had thrown the shade away but I recently found it in boxes that were stored at my parents' house. We had been using the shadeless lamp while we've been working on the house and I was planning on getting a new shade for it sometime soon. I'm so glad that I found the old shade so I could try out covering it with some fabric.
First, I used painter's tape to cover some of the cord and the light bulb socket. I forgot to put tape on the switch, which is something that you probably would want to do if you paint a lamp.
I spray painted it "Peek-a-boo Blue".
As that was drying I started to work on the shade. Now, the process I used may not be the best, but it got the job done. Also, I didn't come up with the idea of how to do it. I've seen quite a few tutorials on other blogs and pulled different ideas together. I don't know the sources because it was a while ago when I saw them.
Here's what I did: I got some wrapping paper and rolled it out with the wrong side up so I could see better. I placed the lamp shade on its side and starting at the seam where the shade is glued together I marked the top and the bottom of the shade with an "x".
Then I slowly traced a line on the bottom edge while rolling the shade until I reached the seam again.
Then I lined up the seam with the top "x" and did the same thing with the top edge. It looked like this:
Then I used a magazine (was too lazy to get a ruler) to connect the x's to make a straight line.
Then I cut the pattern out of the paper and wrapped it around the shade to make sure it would work. Yes, I used Christmas wrapping paper. :)
Next I put the pinned the pattern to my fabric and cut it out.
I'm sure you could use various adhesives but I chose to use this Elmer's multi-purpose spray adhesive because that's what I had here.
Spray generously on the wrong side of the fabric.
Then roll you lamp shade onto the fabric. Make sure you smooth out the wrinkles quickly.
I rolled it all the way around and left a little fabric up.
I folded it over to create a clean line and then I hot glued it down.
Then I hot glued a ribbon starting at the seam and gluing as I went leaving half of the ribbon hanging over the edge.
After I glued the ribbon all the way around, I turned the "hanging" ribbon edge over to the inside of the shade and hot-glued it down.
In hindsight, I should have used a little thicker ribbon, but I had this ribbon already.
Here it is!
Since I already had the lamp, fabric, ribbon, and adhesive, this project only cost a little over $2, which was for the spray paint. It also took less than an hour. Not too bad. :)


Wednesday, July 6, 2011

Table Side Project

Warning: this post is rather lengthy and filled with pictures.

Cory & I interrupted our house painting with a side project. We really only have trim and doors to go but in my opinion, those are the worst things to have to paint. We needed a little break and we also needed wanted a new table for our dining room so that’s exactly what we did.

Here’s our table at our old apartment.

And in our house:

Nothing was wrong with our old table. In fact, I actually really liked it. Cory & I got an old sewing machine base from my grandfather right after we got married that we converted into a table. And when I say “we” I mean Cory and his dad. J David actually made a table top for us out of some wood that Cory had left over from a bookcase he had built. He also added some trim around the edge to make it look more finished. Cory attached the table to the base and all I did was paint it light blue. We loved that the table was rather large and have had up to ten people fitting around it before. When we moved it into our new dining room we realized that we would rather have a rectangular table instead of a square one.

I have been in love with farmhouse tables for a while now. I like the old rugged look to them. Here are some pictures I have collected over the years. I’m sorry I do not have sources to site these pics (I saved them before I found Pintrest). These are just a few of the photos that have been saved.


As soon as we decided to get a rectangle table I began searching for a farmhouse table. I checked furniture stores but the two that I found were VERY expensive, I searched on Craig’s list, and antique stores.(Side note, Cory & I just got back from visiting friends in Atlanta and there were farmhouse tables EVERYWHERE---I guess I should’ve checked there) I had no luck until one day I was reading Dream Book Design about how to make a farmhouse table. (if you haven't seen this blog, you should check it out. It rocks!) I showed Cory the tutorial (along with some others I found online) and he said he would make one. I really liked the one from Dream Book because they used a different base for the table as oppose to four table legs. That’s exactly what I wanted. I love pedestal tables because you can fit more people comfortably around them. I also really wanted to use our sewing machine base because I like the look of it. By using the base we also can keep our old table top and use it again if we ever want to.

Cory went to his mom’s house to look for wood from his dad. He found some Cypress planks (Cory’s favorite type of tree) to use. I love how our first table was constructed by Cory’s dad with leftover wood from Cory and this new table is constructed by Cory with left over wood from David. Although, I really wish David could be here to help construct this one. Using this wood does give the table special meaning though. I know David would be SO proud of Cory and his skills that he acquired from watching him. Anyway, before I get into full on crying, Cory got the wood and got to work. I was going to document each step but this is all I got.

Whoops! Anyway, Cory put the table together and it looked great! To get the old “farmhouse” look, though we had to beat it up a bit. If our neighbors saw us they probably thought we had anger management problems because we were hitting our table with blocks of wood, tools of all sorts, nailing screws and nails to make holes, and throwing things at it. It was actually pretty fun. After we banged it up we stained the table and then put a coat of polyurethane on it. We accidentally put a gloss polyurethane on it so it’s a bit more shiny than we had thought but I actually like it better because it protects the surface better.

Here it is.

And a close up.

And from the side. Please note that we’re in search for a large rug. This one is here for floor protection purposes.

Now for the chairs. Cory and I were so kindly offered a few tables and chairs when we moved into our house. One of those tables was from my sister who lives several hours away. We probably would’ve been fine with getting her old table but it would have been a while before we could’ve gotten it. My mom has actually taken her up on the table offer, which she was the one who bought it for her in the first place. Mom just wants the table to put in her sewing room so she said we could have the chairs. All but two of the chairs to her table are here in town. We actually had two of them at our house. There were four black chairs and two red ones. I didn’t really want too “matchy” of chairs and wanted them to look kind of worn like the table. Here’s an inspiration chair from Restoration Hardware and is about $350 a chair, actually it’s on sale for $229.

Here’s the black chair before. I recovered it back in the fall (here)

I’m usually painting furniture around here but this time I stripped the paint, which isn’t a fun process. Here’s what I used to do that. This stuff works really well. I recommend it if you’re stripping paint. You have to make sure to paint it on rather thick, though.

Here’s the chair after paint stripping, sanding, staining, and polyurethaning it. Oh, and covering the seat with a linen type fabric.

As you can see I left a few places with a little paint and imperfections. It was kind of like “distressing” furniture opposite way.

For the red chairs I decided to skip the paint stripping and just paint over. I really liked the red chairs and it was hard to paint over but they just didn’t fit in our home. Here they are before.

I tried to go with a puddy color but they ended up more blue than green. I also glazed them to get an antique look.


And here’s how it looks all together. I know it may look like junk picked up from side of the road but it’s exactly what I was going for. A little eclectic, if you will. We may add a bench for one side of the table because each side can actually hold three chairs. We'll see, and if we do, you know I'll post a picture.

I’m being stingy and not showing the whole room because there’s a little more tweaking before it’s picture worthy.

Wow, that was long. Thanks for stopping by. J


I've linked to:


Have A Dandy Day | Creative Commons Attribution- Noncommercial License | Dandy Dandilion Designed by Simply Fabulous Blogger Templates